Tuesday, January 31, 2017

Club Scrap January Artist Challenge: Faux Batik

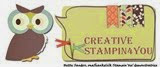
Welcome to the Club Scrap January
Artist Team Challenge and
this month we share with you cards 
with a Faux Batik technique
I hope you have arrived here from
Pam's Blog
and see what wonderful projects she has
come up with.

There are various way of doing this technique
and I used one of the tutorials from
Splitcoaststampers here.

And here are my cards:

For this hop I made 4 cards in the same batik technique
with various stamps. 

This card is made with mostly this months papers
and stamps from the Color Me Happy kit,
but the pot and the sentiment are from
April 2009 Pure and Simple. I love using
distress inks for this way I could also sprinkle
some waterdrops and give the background
an even more batik look.

Here all papers and stamps from the January
Color Me Happy kit. The enamal dots are from
my stash.

The next two cards are made with the base
from the Office kit in combination with
the Color Me Happy kit. 
To be honest this was one of the first trials
of this technique and I almost discarded it. 
But then When I added the sentiment it looked
ready to use. The leather ribbon and beads
are from my Club Scrap stash. 
This card is made with one of my favorite
(vintage wooden) stamp, the tulips.

This was my contribution, but there is
more inspiration. Hop over to
Jennifer's Blog
and see her awesome artwork.

If you hapen to loose your way,
you can always go back to the
Club Scrap Blog
and see all the designer's link addresses.

Thank you for looking
and have a creative day!


Sunday, January 29, 2017

Happy Chinese New Year!

As today a lot of people celebrate the Chinese
New Year, I want to wish you all a very happy
and healthy Year of the Rooster.
On Michael Strongs Blog I found
this free digital image HERE and after downloading
I coloured it in photoshop and 
printed it several times.

The first layer is cut out with 
an oval stitched die from Stampin' Up!
and then I cut the next images with
scissors to give it more dimension.
The layers are taped together with 
foam tape.

Thank you for looking
and have a creative day!


Saturday, January 28, 2017

Saturday Sketch Card: Love

With Valentine coming soon, I thought
it was time for some love cards.
for inspiration. And the heart stamp
Background paper byStampin' Up! (not available anymore)
and the sentiment is by Create with TLC.
The key is one of the metal ideology findings
from Tim Holtz. I decorated the top with a 
large sticky gemstone.

When I noticed the pearl challenge on the
I wanted to enter my card there too.

The heart is stamped with versamark and embossed
with red embossing powder. The pink colouring is 
with distress markers and water.

Thank you for looking
and have a creative day!


Friday, January 27, 2017

CAS sketch challenge 207


Here is my sketch for the challenge on the 
I still had my Club Scrap Color Me Happy rubber 
stamps on my table and came up with this idea.

For the wavy border I first stamped a few of the flowers
on a sticky post it note, so that I could use those
for masking. After stamping the border and the
sentiment, I coloured the flowers with distress
markers. With distress spray broken china I made
the spots you see in the background. I also added some
of the metallic dots that came with this kit.

You find the CAS Colors & Sketches Blog
HERE. And can see more samples of this
fun and wavy sketch.
I had so much fun with the flowers and I had a 
background left over from my card yesterday,
thad I created another card. So you first stamp
2 flowers, put a post it note cut out flower on top
and you can stamp more flowers. Also distress 
markers have been used to color the flowers.

Thank you for looking
and have a creative day!


Thursday, January 26, 2017

Year of the Rooster

Today I have another post for Art Neko
with the Year of the Rooster stamp.
As the Chinese New Year is on Sunday January 28, 
here an idea for some quick cards.

For both cards I used the Year of the Rooster stamp
and the acryl block technique.
For this technique, you need red ink. I used 2 red distress inks.
Also a spray bottle with water, aquarel paper and
black ink for stamping.

Add the ink direct to the block, spritz some water 
on the inkted block. Lay the block on the table
with the ink on the top side. Lay your paper
on top of the inkted block, rub with your hand
(or use a brayer) on top of the paper. 

Carefully lift the paper of the block and see here
the result. Every time you do this it will look
different. Now you take the rooster stamp and 
stamp all over the paper. Stamp the sentiment
and add some spots with black ink.
The brass rooster is added with foam tape.
For this card, I also made the same background.
Here I only stamped the rooster one time
in the center and a sentiment underneath.
It is one of the Holiday Greetings.
The coin is from my stash.

Wishing you all a wonderful celebration.
Thanks for looking and
have a creative day!

Wednesday, January 25, 2017

Club Scrap Blog Hop: Color Me Happy


Welcome to the first monthly Club Scrap Blog Hop in 2017.
I hope you have arrived here via
and seen her wonderful projects.

I have focust this time on my new scrapbook for 2017
and made a front page and the first entry.
For making pages I absolutely love the ALSB -
assembly line scrapbooking - formula.
You find a great instruction video by Tricia here:


For my page I used page 5&6 from the instructions.
The first pages in my book are about ringing in
the New Year at my daughter's house with 
champagne and fireworks. The eldest grandson
came out of bed and enjoyed seeing the 
beautiful firework and going to bed late!

I always make the pages first as they are from the instructions.
Once I add my photo's I make some changes that fit my
personal need, like on the middle strip there was another
text. I typed mine on the computer and printed it
to fit on the strip after cutting it out.

Also the left image I changed. I turned it around and 
the white side was beter for the journaling I wanted to add.

For writing I used the free Beacon font that 
you can  download here.

On the other page I had to adapt the right colomn for
picture, for I had two larger ones. It still gives the same
 impression. I added some journaling on an extra piece 
of paper.

I love the font that comes with this kit.
This is printed and colored with some ink around the borders.

Here again the first page. I am sure you want to know
a little more about how I made this. It is made in a 
few layers.
The first layer is the background on 12x12 inch turquoise paper.
For this background I used the dragonfly stencil
that came with this kit. I used dark blue ink
that shades the stencil perfectly on the paper.

The 2nd layer is the yupo paper that is also in this kit.
With alcohol ink you make a wonderful colored paper. 
All about the technique you find here.

The 3rd layer is the cut out year (with number dies from
Stampin'Up!). I stamped the leaves on top of the 
turquoise paper in black and colored it with green
pencils. The white dots are made with Ranger
white distress spray.

The sentiment is one of the cut aparts that came with 
this kit and I am sure 2017 has lots of moment that
we will smile about!

For mor inspiration, I hope you hop over to
and see what she has come up with.

In case you lose your way, go to the main
and see all participants.

Thank you for looking
and have a creative day!


Tuesday, January 24, 2017

Mojo Monday #481

Today I share with you my card for  the
with stamps and papers from the  Club Scrap
January kit Color Me Happy.
You find this weeks sketch HERE.

The background of this card is embossed with a flower
embossing folder. On the background circle there
you find a piece of yupo paper colored with alcohol ink.
The dragonfly is embossed with dark blue embossing
powder and colored with distress markers.

Hope to see you again tomorrow,
when we have our Club Scrap  monthly blog hop
and you can see what we do with a box of papers 
and rubber stamps.

Thanks for looking
and have a creative day!

Sunday, January 22, 2017

Club Scrap and FMS 271 sketch

As I am working on my project for the
montly Club Scrap Blog Hop
on Wednesday 25th of January
I noticed a sketch and had to make these card,
The paper of the
Color Me Happy kit is so beautiful,
that these cards were ready in no time.

The sketch is from the
that I absolutely love for the easy to
follow sketches and I very often make more
than one card with the sketch, just like today.

I made these 2 cards out of one of the 8 1/2 x 11 inch
pieces of wonderful design paper. I cut it into half
and folded it for two cards.  De decoration on top
is made with the cut aparts that come with the kit
and the birthday stamp.

on this cut apart the happy was printed and
the word birthday is stamped on one of the
scrap pieces that I have left from my project
amd added with foam tape to the strip.

Here I just stamped the birthday sentiment on
a puce of white paper and the grean is a piece
left over from a photo mat. I love the sticky
metal dots in various sizes. They realy belong
to the background.


Thank you for looking and 
have a creative day!


Saturday, January 21, 2017

Saturday sketch card: Penguin

Have you seen the new stamp on Michael Strong's 
Facebook page? Unfortunately it is not available
yet, but I am experimenting with a digital version.
I used the image for this sketch, a sketch from a Dutch
stampgroup. We have a new sketch every month.

I printed the penguins twice. The second set I used
to cut out and made the penguins 3d with foam tape.
The beak and the shoes of the penguin are colored
with a red pencil. The black scalloped background is 
made with a die and the backround paper is from
a design paper block called Stacked with Love
 from Stampin'Up! (not available anymore).
The sentiment is from Create with TLC
and cut out with an oval punch and matching
oval scallop punch. The red dots are two
sticky pearls.

Thank you for looking
and have a creative day!